Steam Deck Monitor Setup: Complete Guide for 144Hz Gaming featured image
setup guide6 min readBy TahTech Team

Steam Deck Monitor Setup: Complete Guide for 144Hz Gaming

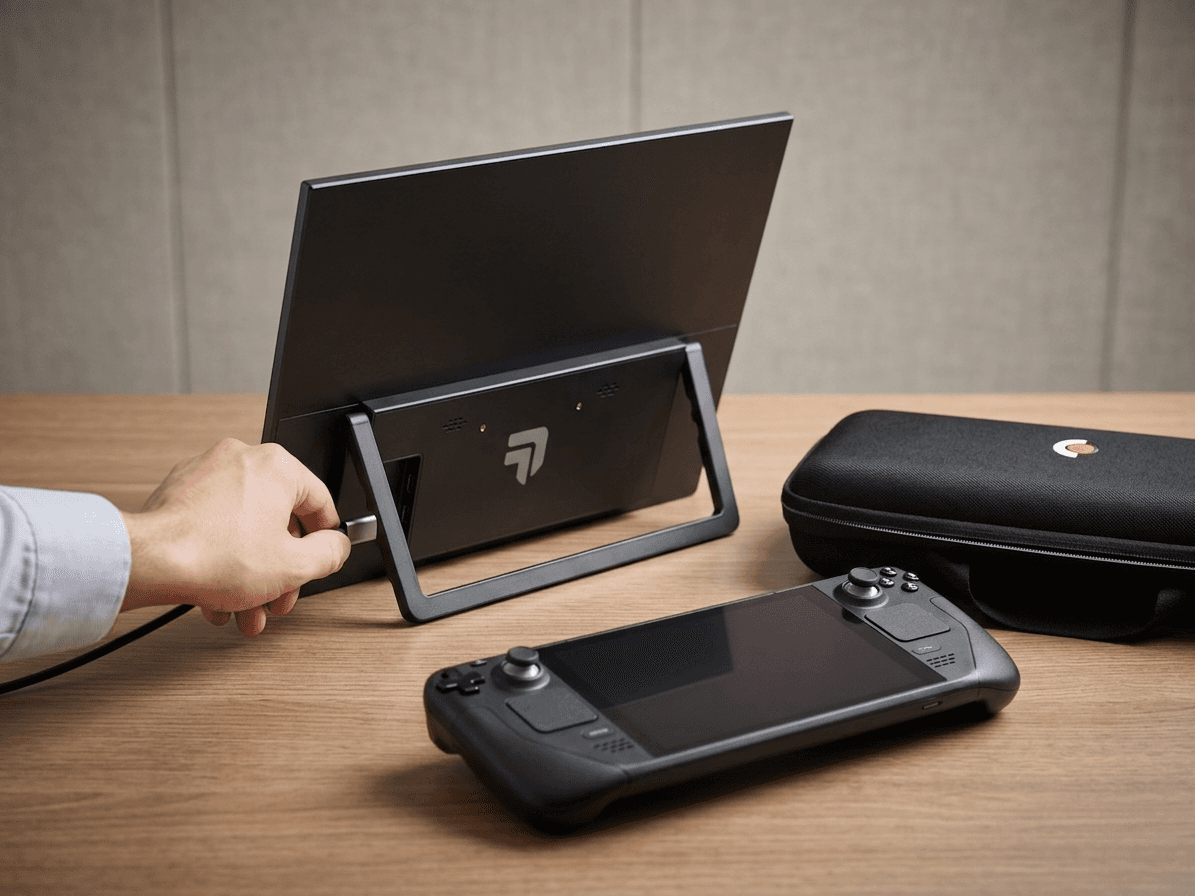
Learn how to connect your Steam Deck or Steam Deck OLED to an external monitor. USB-C setup, display settings, and tips for the best gaming experience.

Steam DeckSteam Deck OLEDexternal monitorUSB-C144Hzsetup guide

The Steam Deck is an incredible portable gaming machine, but sometimes you want to game on a bigger screen. Whether you have the original Steam Deck or the newer OLED model, connecting to an external monitor is simple and opens up a whole new gaming experience. This comprehensive guide covers everything from cable selection to optimizing your display settings for the best performance.

Understanding Steam Deck Display Output

Before diving into the setup, it's important to understand what the Steam Deck can output to external displays. Both the original Steam Deck and Steam Deck OLED support USB-C DisplayPort Alt Mode, which allows video and audio output through the USB-C port.

Maximum Supported Resolution and Refresh Rate

The Steam Deck can output up to 4K@60Hz or 1080p@120Hz via its USB-C port. While the internal display runs at 60Hz (90Hz for OLED), connecting to a high refresh rate external monitor can provide smoother gameplay, especially for lighter titles that can hit higher frame rates. The native aspect ratio of the Steam Deck is 16:10 (1280×800), so monitors with a 16:10 aspect ratio (like 1920×1200) provide the best compatibility without black bars.

Power Considerations

When you connect an external display, the Steam Deck will use additional power to drive the monitor. This can drain your battery faster. For extended gaming sessions, consider using the official Steam Deck charger or connecting external power to your monitor if it supports USB Power Delivery passthrough.

What You Need

Setting up your Steam Deck with an external monitor requires minimal equipment, but choosing the right cables and accessories makes a big difference.

Cable Options

For the simplest setup, use a USB-C to USB-C cable if your monitor supports USB-C DisplayPort Alt Mode. This allows a single cable to handle video, audio, and power. If your monitor only has HDMI, you'll need a USB-C to HDMI adapter or cable. Make sure your cable is rated for at least 4K@60Hz to ensure compatibility with high refresh rates. Avoid cheap cables as they can cause display issues or fail to support higher resolutions.

Optional: USB-C Hub or Dock

While not required, a USB-C hub or dock can enhance your setup by providing additional USB ports for controllers, keyboards, and mice while simultaneously charging your Steam Deck. Look for hubs that support DisplayPort Alt Mode and USB Power Delivery. The official Steam Dock is a great option, but third-party USB-C hubs work just as well if they meet these specs.

Step-by-Step Connection Guide

Follow these steps to connect your Steam Deck to an external monitor and configure it for optimal gaming.

Step 1: Physical Connection

Connect your USB-C cable from the Steam Deck's USB-C port (located at the top) to your monitor's USB-C or HDMI input. If you're using a USB-C hub or dock, connect the hub to the Steam Deck first, then connect your monitor to the hub. Make sure your monitor is powered on and set to the correct input source.

Step 2: Wake and Detect

Wake your Steam Deck if it's in sleep mode. The Steam Deck should automatically detect the external monitor within a few seconds. You'll see the Steam Deck interface appear on the external display. If it doesn't detect automatically, go to the Steam Deck's system settings to manually configure the display.

Step 3: Configure Display Settings

Press the Steam button, then navigate to Settings > Display. Here you can choose whether to mirror your display (duplicate on both screens) or extend it. For gaming, mirroring is usually the best option as it displays the same content on both the Steam Deck screen and external monitor. You can also set the external monitor as the primary display if you prefer to use only the big screen.

Step 4: Set Resolution and Refresh Rate

In the Display settings, select your external monitor and choose the resolution. For the best experience, match your monitor's native resolution (e.g., 1920×1080 or 1920×1200). Then set the refresh rate to the maximum supported by your monitor. Even though the Steam Deck's internal display is limited to 60Hz (or 90Hz for OLED), the external output can go higher, providing smoother gameplay for games that can hit those frame rates.

Optimizing Performance on External Displays

To get the most out of your Steam Deck when gaming on an external monitor, you'll want to optimize a few settings.

Adjust Frame Rate Limits

In the Steam Deck's Quick Access menu (press the ... button), you can set a frame rate limit. When gaming on an external monitor, consider raising this limit to match your monitor's refresh rate. For example, if you have a 144Hz monitor, you might want to cap the frame rate at 60Hz, 90Hz, or 120Hz depending on the game's performance. This helps prevent screen tearing and provides a smoother experience.

Game-Specific Settings

Some games may require you to adjust their in-game display settings to match your external monitor. Make sure to set the game's resolution to match your monitor's native resolution and enable V-Sync or use adaptive sync (FreeSync/G-Sync) if your monitor supports it. This will reduce screen tearing and provide a smoother gaming experience.

Battery Management

Gaming on an external display drains the battery faster. To preserve battery life, keep your Steam Deck plugged into its charger during extended gaming sessions. If your monitor supports USB Power Delivery, it may be able to charge the Steam Deck while connected, though the charging rate may be slower than using the official charger.

Troubleshooting Common Issues

If you're experiencing issues with your external monitor setup, try these solutions.

No Display on External Monitor

First, check that your cable is properly connected and that your monitor is powered on and set to the correct input. Try restarting your Steam Deck with the cable connected. If you're using a USB-C hub, make sure it supports DisplayPort Alt Mode. You can also try a different cable or adapter to rule out hardware issues.

Display Flickering or Artifacts

This is often caused by a low-quality or damaged cable. Try using a certified USB-C cable rated for at least 4K@60Hz. If the issue persists, lower the refresh rate or resolution in the Steam Deck's display settings. Some monitors also have firmware updates that can improve compatibility — check your monitor manufacturer's website.

Audio Not Playing Through Monitor

If your monitor has built-in speakers but audio is still playing through the Steam Deck, you need to manually select the audio output device. Press the Steam button, go to Settings > Audio, and select your monitor's audio output. Note that USB-C DisplayPort connections support audio output, but HDMI adapters may vary in audio support.

Best Monitor Aspect Ratios for Steam Deck

The Steam Deck's native display is 16:10 (1280×800), so choosing a monitor with the same aspect ratio provides the best compatibility. Monitors with 1920×1200 (16:10) resolution will display Steam Deck games without black bars and give you a perfect scaled-up version of the native display. However, standard 16:9 monitors (1920×1080) work perfectly fine as well — you may just see small black bars on the top and bottom in some games, or the image may be slightly stretched depending on your scaling settings.

Conclusion

Connecting your Steam Deck to an external monitor is a great way to enhance your gaming experience, whether you're at home or on the go. The USB-C connection makes setup incredibly simple, and with the right settings, you can enjoy smooth, high-resolution gaming on a bigger screen. Remember to optimize your refresh rate, resolution, and battery settings for the best experience, and don't hesitate to experiment with different configurations to find what works best for your games and setup.

Looking for a Monitor?

Check out our device-specific guides and the Flow V1 monitor